Simple Steps For Installing Your Headboard Easily
Transforming your sleeping space can feel like a big project, can't it? Yet, sometimes, the smallest additions make the biggest difference, and that's exactly what a headboard does for a room. It's more than just a piece of furniture; it gives your bed a real focal point, adding comfort and a touch of your own personal style. You know, a cozy bedroom often starts with a bed that feels complete, and a headboard helps a lot with that.
Thinking about how to install a headboard might seem a bit much, but it's really a straightforward task once you know the steps. This guide is here to walk you through everything, from getting ready to putting the final touches on your new bedroom look. We'll talk about what you need and how to do it right, so you can enjoy your refreshed space very soon.
We'll cover different kinds of headboards and the best ways to set them up, so you can pick what works for you. You'll find out what to check before you even start, and we'll go through the process step by step. It's almost like putting together a puzzle, but with a beautiful result that you get to enjoy every day, so it's worth the effort, really.
Table of Contents
- Getting Ready for Headboard Installation
- Different Ways to Attach a Headboard
- Step-by-Step Guide to Installing Your Headboard
- Fixing Common Headboard Installation Issues
- Making Sure Your Headboard Looks Perfect
- Keeping Your Headboard Looking Good
Getting Ready for Headboard Installation
Before you even think about lifting that headboard, a little bit of preparation goes a long way, you know? It's like planning a trip; you wouldn't just jump in the car without knowing where you're going or if you have enough gas. This first part is all about making sure you have what you need and that your headboard will fit just right. It really helps to avoid surprises later on, so take your time here.
Understanding Your Headboard and Bed Frame
First off, you need to check if your headboard supports your bed frame and other room requirements, so it's a bit like checking if software supports your operating system. Every headboard is a little different, and bed frames vary a lot too. Some headboards come with pre-drilled holes that line up with specific bed frames, and some don't. You'll want to look at the width of your headboard and compare it to your bed frame's width. A queen headboard usually fits a queen bed frame, for instance. Also, think about the height. Will it block a window or outlet? These are important things to consider, naturally.
Before you set up your headboard, you can check if it's compatible with your bed frame and the other things your room needs. This means looking at the instructions that came with your headboard. They usually tell you what kind of bed frame it's designed for. If you don't have the instructions, measure the distance between the mounting points on your headboard and then measure the corresponding spots on your bed frame. They should match up pretty closely, you know, or at least be adjustable. Sometimes, you might need a special adapter plate, so it's good to know this upfront.
Gathering Your Tools and Parts
Having the right tools ready makes the job so much smoother, really. Imagine trying to open a can without a can opener; it's just not going to work well. For headboard installation, you'll typically need a few basic things. This might include a screwdriver, an adjustable wrench, or perhaps a drill if you're wall-mounting. You'll also want to make sure you have all the bolts, washers, and nuts that came with your headboard. If something is missing, it's better to find out now than in the middle of the process, so you can get what you need.
To check if a headboard is good, find out what other people say about it, and under the headboard's description, check the reviews and how many people liked it. This can also give you hints about what tools others found useful. You might need a level to make sure your headboard isn't crooked, especially if you're attaching it to the wall. A measuring tape is always helpful for getting things just right. And a pencil for marking spots, too. Having a small dish or cup for holding tiny screws and bolts is a very good idea, as they can easily roll away.
Different Ways to Attach a Headboard
Headboards aren't one-size-fits-all when it comes to how they attach, you know? There are a few main ways they can be set up, and understanding these will help you figure out the best approach for your specific headboard. Each method has its own benefits and steps, so it's good to know what you're working with before you begin. This part will explain the most common types and how they generally connect, so you're well-prepared.
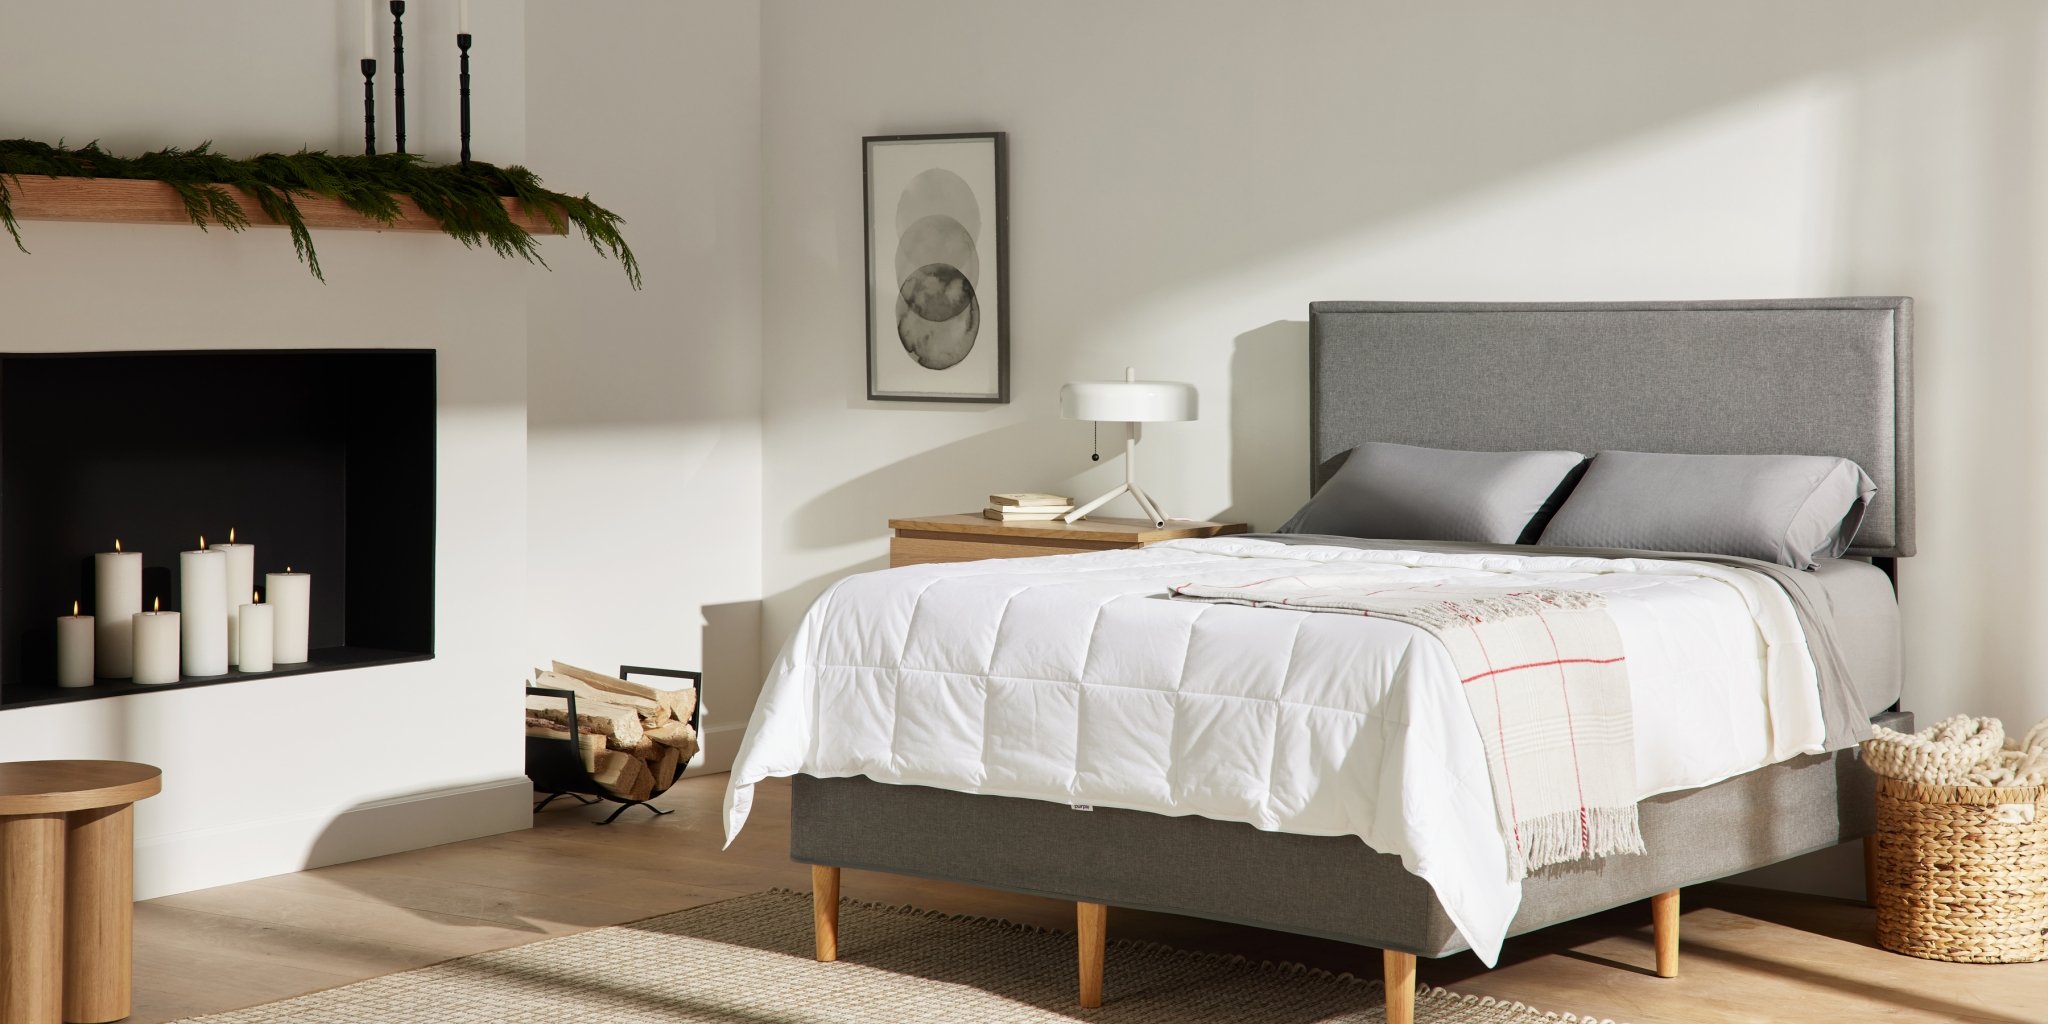
Bed-Frame Mounted Headboards
These are probably the most common type, and they connect directly to your bed frame, which is pretty convenient. Most bed frames have pre-drilled holes at the head end, designed specifically for this purpose. Your headboard will have corresponding legs or brackets with holes that line up. You simply use bolts, washers, and nuts to secure the headboard legs to the bed frame. It's a pretty stable setup, and it moves with your bed, which is nice. This is often the simplest way to go, actually.
When you're looking at how to install a headboard that mounts to the frame, you'll notice the legs usually have multiple holes. This allows for some height adjustment, which is great if you have a very thick mattress or want your headboard to sit higher or lower. You can select the right parts, like the bolts, that fit through these holes. Make sure the bolts are long enough to go through both the headboard leg and the bed frame bracket, and that they have enough thread for the nut to catch securely. Sometimes, you'll need a wrench to tighten these, so keep that handy.
Wall-Mounted Headboards
Wall-mounted headboards are a bit different because they don't attach to your bed at all; they go straight onto the wall behind it. This can create a very clean, floating look, which many people like. It also means your headboard won't wobble or make noise if your bed frame moves, which is a definite plus. However, it does mean you'll be drilling into your wall, so you need to be careful about finding studs or using proper wall anchors. It's a slightly more involved process, but the result can be very striking, really.
For how to install a headboard on the wall, you'll often use a French cleat system or metal brackets. A French cleat involves two pieces of wood or metal cut at an angle; one attaches to the wall, and the other to the headboard, and they interlock. With brackets, you screw them to the wall and then hang the headboard on them. You'll need a stud finder to locate the wooden studs behind your drywall, as these provide the most secure attachment points. If you can't hit a stud, you'll need heavy-duty wall anchors that can support the weight of your headboard. This is important for safety, naturally.
Freestanding Headboards
Freestanding headboards are the simplest to "install" because they don't attach to anything at all. They just stand on the floor behind your bed, often propped up by the bed itself. These are great if you rent and can't drill into walls, or if you simply want the flexibility to move your bed around easily. They usually have sturdy legs that extend down to the floor. While they are easy to place, they can sometimes shift or wobble if not properly positioned or if your bed moves a lot. You can get and set up your headboard at no extra charge, and use it to make your room look nice, which is a great benefit, honestly.
When you're considering how to install a headboard that is freestanding, the main thing is positioning. You'll want to push your bed frame firmly against the headboard to keep it in place. Some freestanding headboards are quite heavy and stable on their own, while others might benefit from a little grip pad under the legs to prevent sliding. They offer a lot of flexibility in terms of style and placement, too. It's a good choice for those who prefer not to deal with drilling or bolting, and it still gives your bed that finished look, so it's a very practical option.
Step-by-Step Guide to Installing Your Headboard
Now that you know about the different kinds of headboards and what you need, it's time to get to the actual setting up part. This section will walk you through the process, step by step, for each common type of headboard. Remember to take your time and follow the instructions carefully. It's not a race, and doing it right the first time will save you headaches later on, you know? Just go at your own pace, and you'll do great.
Unpacking and Checking Everything
Before you do anything else, carefully unbox your new headboard. Lay out all the pieces on a clean, flat surface, like a rug or a blanket, to protect both the headboard and your floor. Check the parts list that came with your headboard to make sure you have every single item. This is a bit like getting the parts list again for a software installation. If anything is missing or damaged, it's important to contact the seller right away. You don't want to get halfway through and realize you're missing a crucial bolt, so check everything thoroughly.
Also, take a moment to look over the headboard itself for any scratches or defects. Sometimes things happen during shipping, and it's better to spot them now. If you try all these ways to fix things and still can't set up your headboard, share your thoughts with the seller, naturally. Make sure all the pre-drilled holes are clear and ready for bolts. This initial check can save you a lot of trouble down the line, so it's a very important first step, really.
Attaching to a Bed Frame
This is for headboards that connect directly to your bed frame. First, pull your bed frame away from the wall a bit, so you have room to work behind it. Align the headboard legs with the mounting brackets on your bed frame. You'll see holes on both. You might need to adjust the height of the headboard legs by choosing different sets of holes, so pick the ones that work best for your mattress height and overall look. It's about finding that sweet spot, you know.
Once the holes line up, insert the bolts through the headboard leg and the bed frame bracket. Put a washer on the other side, then thread on the nut. Hand-tighten all the bolts first. Do not fully tighten any one bolt until all of them are in place. This allows for a little bit of wiggle room to make sure everything aligns perfectly. Once all bolts are in, use your wrench or screwdriver to tighten them securely. Don't overtighten, but make sure they are snug. Give the headboard a gentle shake to make sure it feels stable. This method is usually quite simple, honestly.
Mounting to the Wall
For wall-mounted headboards, this process is a bit more involved, but it's very doable. First, decide on the exact height you want your headboard to sit. Measure from the floor up to where the bottom of the headboard will be, and then mark that spot on the wall. Use a level to draw a straight line across the wall at that height. This line will guide where you place your mounting hardware. You know, precision here really matters for a straight headboard.
Next, use your stud finder to locate the wall studs along that line. Mark the center of each stud. If your headboard mounting points don't line up with studs, you'll need to use appropriate wall anchors. Drill pilot holes for your screws or anchors at the marked spots. Then, attach the wall-mounting brackets or the wall-side of your French cleat to the wall, making sure they are perfectly level. Lift the headboard and carefully hook or slide it onto the wall-mounted hardware. You might need a helper for this step, as headboards can be heavy. Double-check that it's secure and level once it's up, so it looks just right.
Setting Up a Freestanding Headboard
This is the easiest one, really. Simply position the headboard against the wall where you want it to sit. Make sure it's centered behind your bed. Then, push your bed frame firmly against the headboard. The weight of your bed, mattress, and box spring (if you have one) will help hold the headboard in place. That's pretty much it for the main setup. It's almost too simple, isn't it?
While it's simple, you might want to consider adding a little something to prevent it from sliding or scratching the wall. You could put felt pads on the back of the headboard where it touches the wall, or rubber grippers under the legs if they are prone to slipping on your floor. Some people even use a small piece of non-slip rug pad between the headboard and the bed frame for extra stability. Rooms with different styles might benefit from different solutions. It's about making sure it stays put and doesn't cause any marks, so a little extra thought here can go a long way, naturally.
Fixing Common Headboard Installation Issues
Even with the best plans, sometimes things don't go exactly as expected when you're figuring out how to install a headboard. Don't worry, most common problems have simple solutions. It's like when you're trying to get a new app to work; sometimes you just need to try a few troubleshooting steps. Here are some typical issues you might run into and how to sort them out, so you can get back on track quickly.
One common issue is that the headboard wobbles after installation. If it's a bed-frame mounted headboard, this usually means the bolts aren't tight enough. Go back and tighten all the bolts securely, making sure to use a wrench for a good grip. Sometimes, the holes on your bed frame and headboard might not perfectly align, causing a slight wobble. In this case, you might need to use washers on both sides of the bolt to fill any small gaps, which can really help stabilize it. If the installation still isn't working, use a different method, like adding shims, perhaps.
For wall-mounted headboards, wobbling often means the anchors aren't secure or you haven't hit a stud. If you didn't use a stud finder, now might be the time to get one and try to re-mount it into a stud. If you used anchors, make sure they are rated for the weight of your headboard and are properly installed in the drywall. Sometimes, the screws might be a little loose in the anchors, so tighten them gently. Remember, safety is key when mounting things to the wall, so it's worth taking the time to fix any instability, you know.
Another issue might be that the headboard doesn't line up perfectly with the bed. For bed-frame mounted ones, check if you're using the correct height settings on the headboard legs. You might need to move the bolts to a different set of holes. For freestanding headboards, simply push the bed firmly against the headboard and ensure it's centered. For wall-mounted ones, this means your initial measurements might have been off. You'll need to carefully unmount it, remeasure, and re-mark your spots before drilling again. It's a bit of extra work, but it ensures a neat look, naturally.
Sometimes, you might find that the headboard is too tall or too short for your liking after it's installed. This is mostly an aesthetic issue, but it can be annoying. If it's bed-frame mounted, you can adjust the height by changing which holes you use on the headboard legs. If it's wall-mounted, you'll need to re-drill your mounting holes higher or lower on the wall. For freestanding ones, you're pretty much stuck with the height it is, but you can sometimes add risers under the legs if it's too short, which is a neat trick, honestly.
Making Sure Your Headboard Looks Perfect
Once your headboard is securely in place, you want to make sure it looks its best, don't you? A few final touches can really complete the picture and make your bedroom feel truly finished. It's about making sure all your hard work pays off with a beautiful result. These small steps can make a big difference in how your new headboard fits into your room's overall feel, you know.
First, double-check that the headboard is perfectly level. Use your spirit level one last time, especially if it's wall-mounted or attached to the bed frame. Even a slight tilt can be noticeable and detract from the look. If it's off, make small adjustments to the bolts or mounting hardware until it's just right. This attention to detail really shows, naturally.
Next, think about how the headboard interacts with your bedding. Does your comforter or duvet drape nicely over the bottom edge of the headboard, or does it get caught? You might need to adjust how you make your bed slightly. Also, consider adding decorative pillows that complement the headboard's style and color. They can tie the whole look together and make your bed feel even more inviting, so it's worth playing around with different arrangements.
Finally, step back and admire your work. Look at the headboard from different angles in the room. Does it feel balanced? Does it enhance the space as you hoped? Sometimes, simply moving a nightstand a little bit or adjusting a lamp can make the whole setup feel more harmonious. Your headboard help guide is now complete, and you can enjoy your refreshed bedroom. It's amazing what a single piece can do for a room's vibe, isn't it?
Keeping Your Headboard Looking Good
Now that your headboard is all set up and looking wonderful, you'll want to keep it that way, right? Just like any piece of furniture, a little care and attention will help it stay beautiful for a long time. Different materials need different kinds of cleaning, so knowing what your headboard is made of will help you care for it properly, naturally.
For fabric headboards, regular vacuuming with a brush attachment can help remove dust and small bits. If there are spills, try to blot them immediately with a clean, damp cloth. Avoid harsh chemicals, as they can damage the fabric or cause discoloration. For tougher stains, you might need a specialized fabric cleaner, but always test it on a hidden spot first. This helps to prevent any surprises, you know.
Wooden headboards usually just need a gentle dusting with a soft cloth. For a deeper clean, a slightly damp cloth with a mild wood cleaner can work wonders. Make sure to wipe it dry immediately afterward to prevent water spots. Avoid placing very hot or cold items directly on the wood, as this can cause marks. A good wood polish every now and then can also keep it looking shiny and protected, so it maintains its charm.
Metal headboards are pretty easy to care for. A quick wipe with a damp cloth usually does the trick for dust and smudges. If your metal headboard has a special finish, like a powder coat, be gentle with abrasive cleaners. For chrome important parts, you might want to use a specific metal cleaner to keep them gleaming. You can download and install the chrome web browser at no charge, and use it to browse the web, just like you can care for your headboard to keep it looking great. It's about keeping that shine, really.
No matter the material, checking the tightness of the bolts or mounting hardware every few months is a good idea. Things can loosen over time with daily use. A quick check and tightening will prevent any wobbling and ensure your headboard stays safe and secure. This small step can really extend the life and stability of your headboard. It's like a little tune-up for your bedroom's centerpiece, so it's a very practical habit to get into.
Frequently Asked Questions (FAQs)
Here are some common questions people ask about how to install a headboard:
How do I attach a headboard if my bed frame doesn't have holes?
If your bed frame lacks mounting holes, you have a few good choices. You can get universal headboard brackets, which are designed to connect different bed frames to headboards. These usually attach to the frame's side rails and provide the necessary connection points. Another option is to choose a wall-mounted headboard, which doesn't need to connect to the bed frame at all. Or, you could pick a freestanding headboard that simply rests on the floor behind your bed, so it's pretty flexible, really.
Can I install a headboard by myself?
Many headboards, especially lighter bed-frame mounted or freestanding ones, can be installed by one person. However, for heavier or larger headboards, particularly wall-mounted ones, having a second person to help lift and hold things in place makes the job much safer and easier. It's a bit like trying to move a big piece of furniture alone; it's possible, but a helping hand is always better, you know.
What tools do I need to install a headboard?
The exact tools depend on the type of headboard, but generally, you'll need a few basics. A screwdriver (Phillips or flathead, depending on your screws), an adjustable wrench for bolts, and a measuring tape are almost always useful. For wall-mounted headboards, you'll also need a stud finder, a level, and a drill with appropriate drill bits and wall anchors. Having a pencil for marking and a small container for hardware is also very handy, so it's good to be prepared, naturally. Learn more about headboard types and styles on our site, and check out this page for more home improvement tips.

Personalized/custom Made Upholstered Twin/double/queen/king Headboards
Headboard Installation Tips and Tricks | Purple

Wallpaper Headboard Diy | Headboard
