How To Braid Hair: Simple Steps For Beautiful Styles Today
Learning how to braid hair can feel like finding a secret superpower, truly. You see, a well-done braid, much like a carefully constructed knot for fishing line, offers both beauty and a certain kind of strength, holding everything together. It's a classic look that never goes out of style, and for very good reason, too.
Whether you are just starting out or hoping to pick up a new technique, knowing how to braid hair opens up so many possibilities for your look. From quick, everyday styles to something a bit more elaborate for a special gathering, braids are wonderfully adaptable. They are, in a way, a timeless expression of personal flair.
This guide will walk you through the core steps and some popular variations, helping you gain the confidence to create lovely braided looks yourself. We will cover the basic three-strand plait and move on to some favorites like the French and Dutch braids. So, let's get your fingers ready for some fun with hair, shall we?
Table of Contents
- Getting Ready for Your Braid
- The Classic Three-Strand Braid
- Mastering the French Braid
- Creating the Dutch Braid
- Exploring Other Braid Styles
- Tips for Different Hair Types
- Keeping Your Braids Looking Great
- Frequently Asked Questions About Braiding
Getting Ready for Your Braid
Before you even begin to think about how to braid hair, a little preparation goes a long way, honestly. Think of it like preparing your fishing line; you want it smooth and ready for action. You will want to start with hair that is clean but not too slippery, which means day-old hair can often be just right. This gives it a bit of grip, making it easier to hold the strands.
Gather a few basic tools, too. A comb or brush helps to detangle and smooth out any knots. Hair ties or small elastic bands are essential for securing your braid once it's done. You might also want a mirror, especially when you are learning to braid your own hair. A spray bottle with water can help dampen hair that is too dry, making it more manageable, you know?
Some people find a little bit of styling product, like a light holding spray or a texturizing mousse, can help keep flyaways in place and give the hair more structure. This is particularly helpful if your hair is very fine or tends to slip. Just a small amount usually does the trick, so it's almost a perfect touch for control.
The Classic Three-Strand Braid
This is where most people begin their journey into how to braid hair. The three-strand braid is the most fundamental technique, and once you get the hang of it, many other styles will seem much simpler. It's the base, the core, a bit like the essential "辫结的闭合" (braid closure) concept from the text, where connecting ends gives you a complete structure.
This braid is incredibly versatile. You can do it on a ponytail, at the end of a French braid, or even create multiple small braids throughout your hair. It is a very good starting point for anyone wanting to learn, and it truly helps build hand memory for braiding.
Step-by-Step Classic Braid
Prepare Your Hair: First, comb through the section of hair you want to braid, making sure it is smooth and free of tangles. For a simple braid, you can gather all your hair into a ponytail first, or just take a section from the back of your head, that's it.
Divide into Three: Now, separate that section of hair into three equally sized strands. Let's call them left, middle, and right strands for clarity. This division is key to how braid hair properly.
Cross the Right Strand: Take the right-most strand and cross it over the middle strand. The right strand is now in the middle position, and the original middle strand is now on the right. This is the first movement, and it feels pretty natural.
Cross the Left Strand: Next, take the left-most strand and cross it over the new middle strand. The left strand is now in the middle, and the original middle strand (which moved to the right) is still on the right. You are more or less just alternating sides.
Repeat the Process: Keep repeating steps 3 and 4, always taking the outside strand and crossing it over the middle strand. You will see a lovely, interwoven pattern start to form as you go down the length of the hair. It's almost like a rhythmic dance for your fingers.
Secure the End: Once you reach the end of the hair, or as far down as you want your braid to go, secure it tightly with a hair tie or elastic band. You can gently pull apart the loops of the braid for a fuller, softer look, if that is what you like.
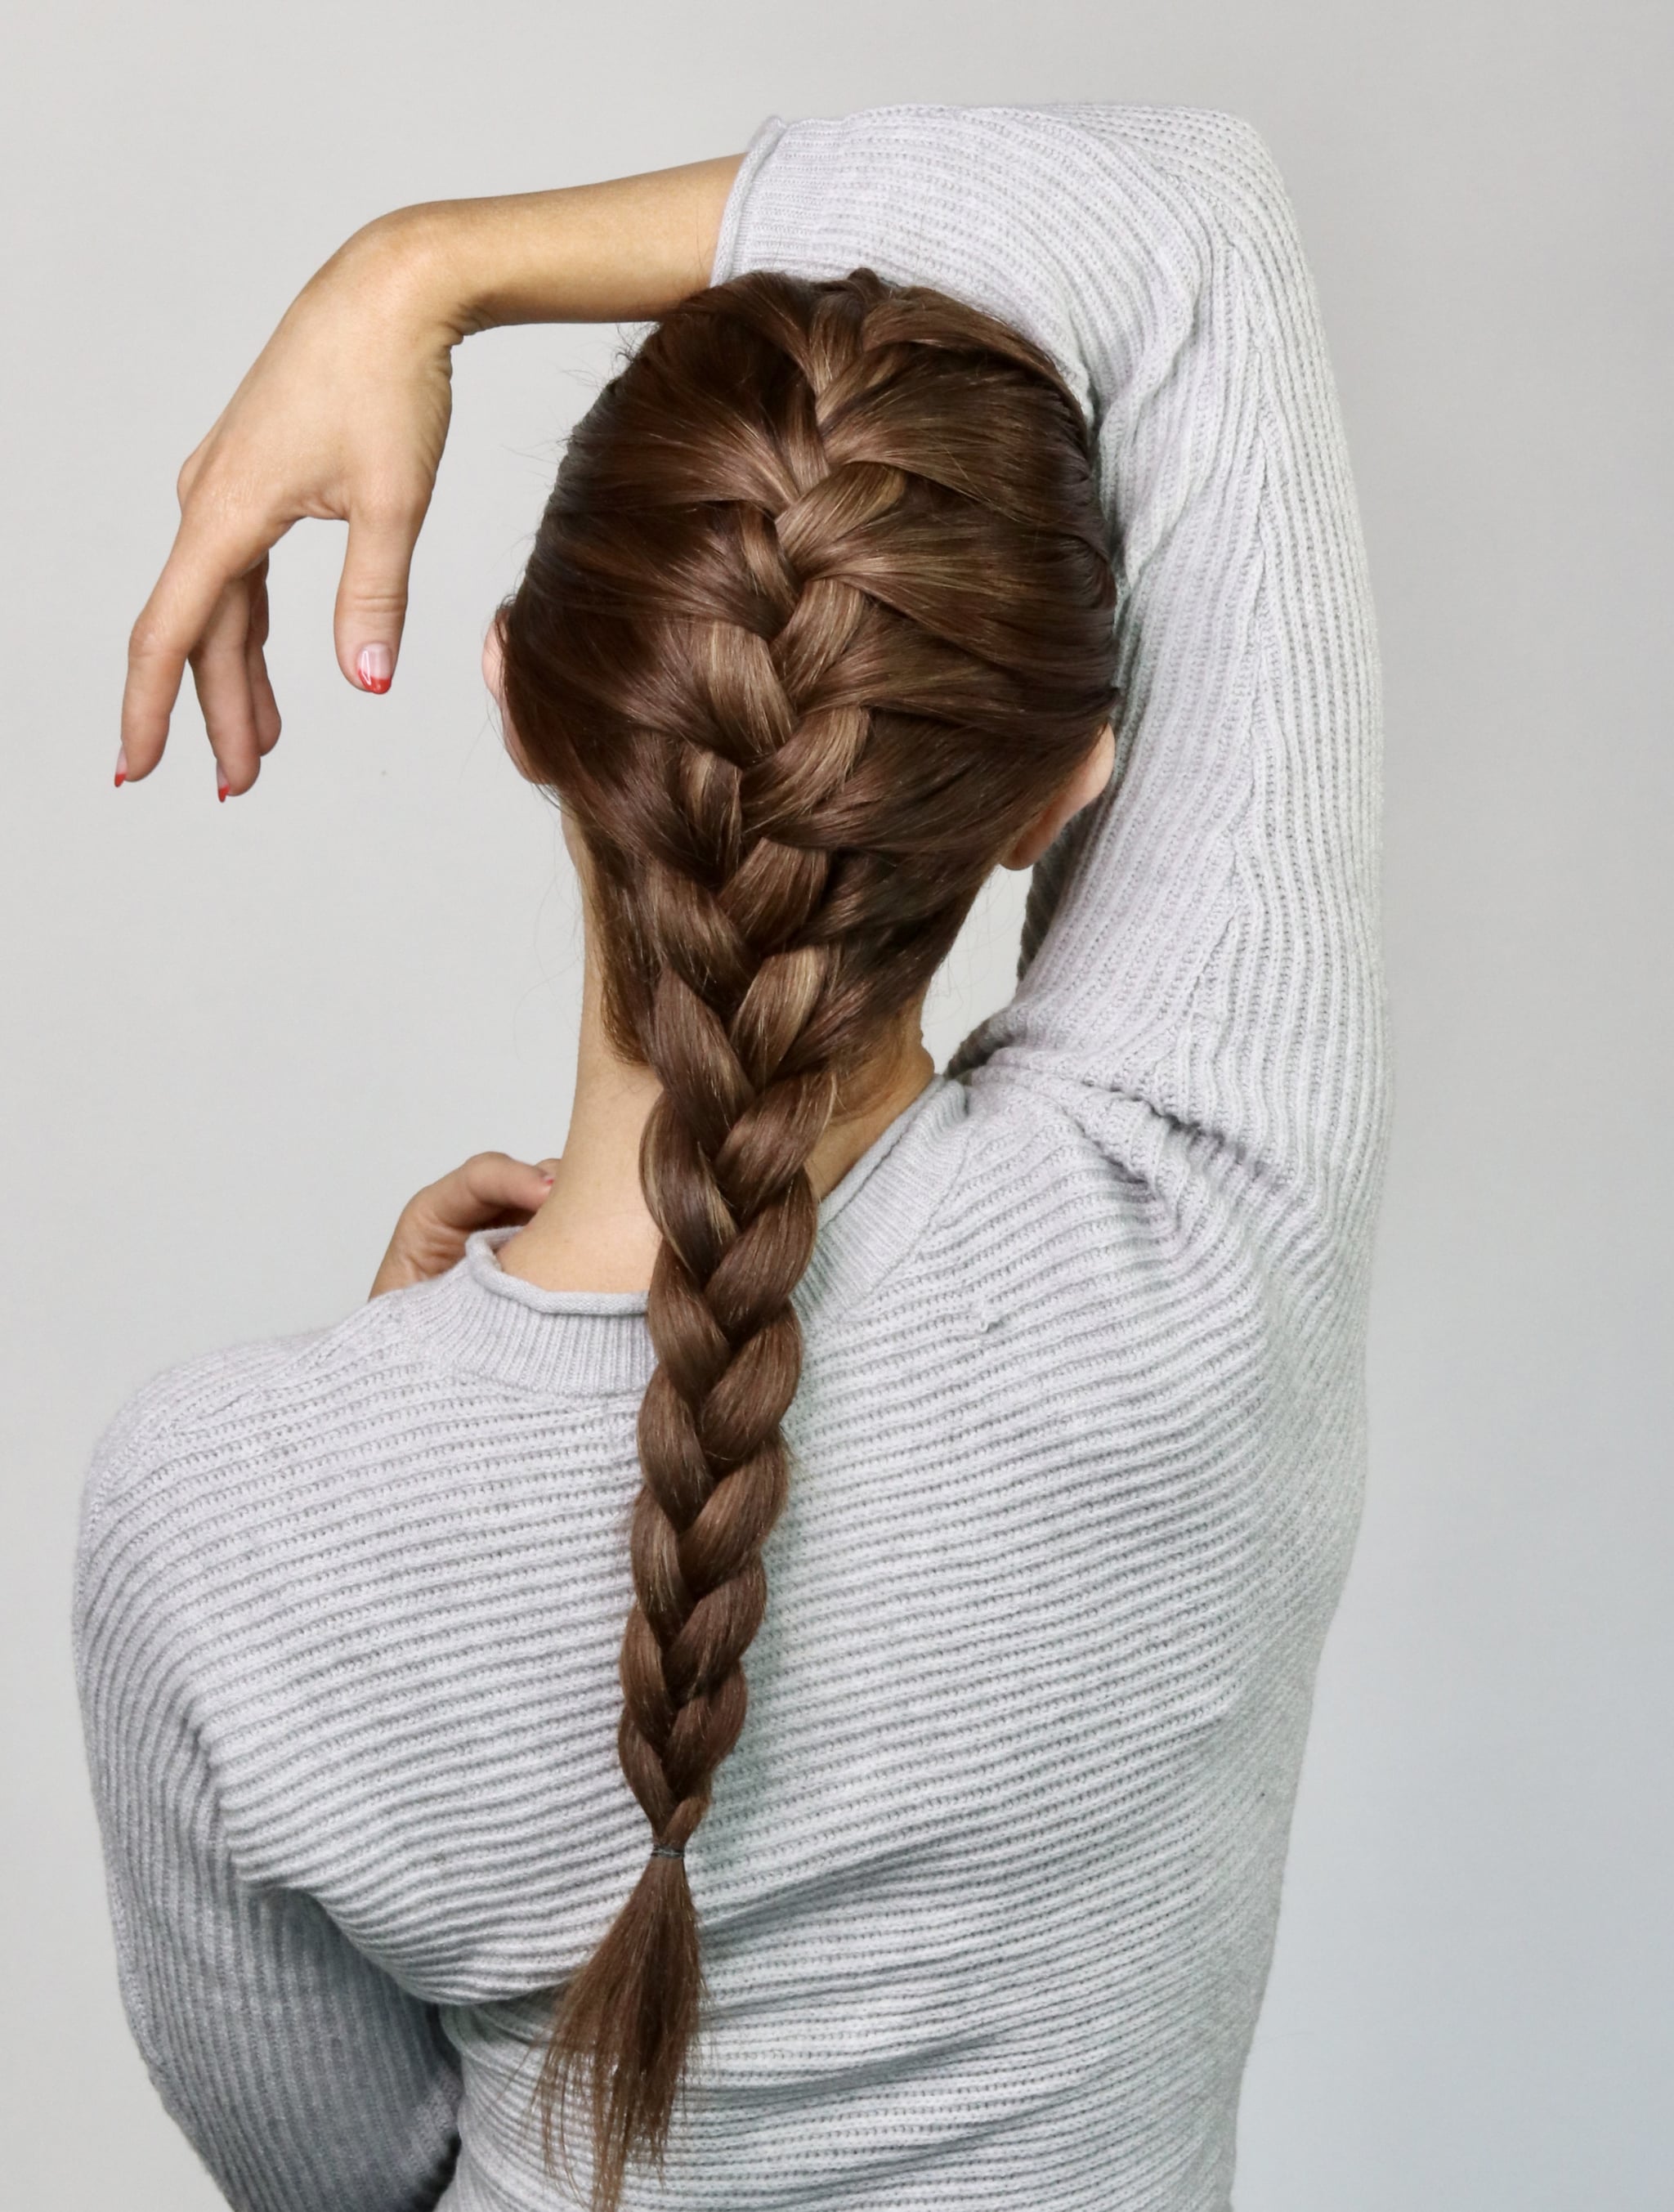
Mastering the French Braid
The French braid is a classic and elegant style that incorporates hair from the sides as you go, creating a braid that lies flat against the scalp. It is a bit more involved than the basic three-strand, but with practice, it becomes quite easy. This style, you know, really shows off the skill of how to braid hair seamlessly into your overall look.
It's perfect for keeping hair out of your face, whether you are exercising or just want a neat, polished appearance. Many people find it a little tricky at first, especially when trying to braid their own hair, but patience truly pays off here. It's a very rewarding style to master.
Step-by-Step French Braid
Start at the Top: Begin by taking a section of hair from the crown of your head, right at the top. This section should be about two to three inches wide, depending on how thick you want your braid to be. Make sure this initial section is smooth.
Divide and Begin: Divide this top section into three equal strands, just like you would for a classic braid. Perform one or two passes of a regular three-strand braid: cross the right strand over the middle, then the left strand over the new middle. This establishes your base, you see.
Add Hair from the Sides (Right): Now, before you cross the right-most strand over the middle again, pick up a small, new section of hair from the right side of your head. Add this new hair to your right-most strand. Then, cross this combined, thicker right strand over the middle strand. This is where the "French" part of how to braid hair comes in.
Add Hair from the Sides (Left): Similarly, before you cross the left-most strand over the middle, pick up a small, new section of hair from the left side of your head. Combine this new hair with your left-most strand. Then, cross this combined, thicker left strand over the middle strand. You are basically incorporating more hair as you go.
Continue Adding and Braiding: Keep repeating steps 3 and 4, always adding new hair from the sides to the outer strand before crossing it over the middle. Try to keep the sections of added hair consistent in size for a neat, even braid. This part requires a bit of rhythm, actually.
Finish with a Classic Braid: Once you have gathered all the hair from the sides of your head, you will be left with three main strands. From this point, simply continue with a classic three-strand braid down the remaining length of the hair. Secure the end with a hair tie. It's pretty straightforward from there.
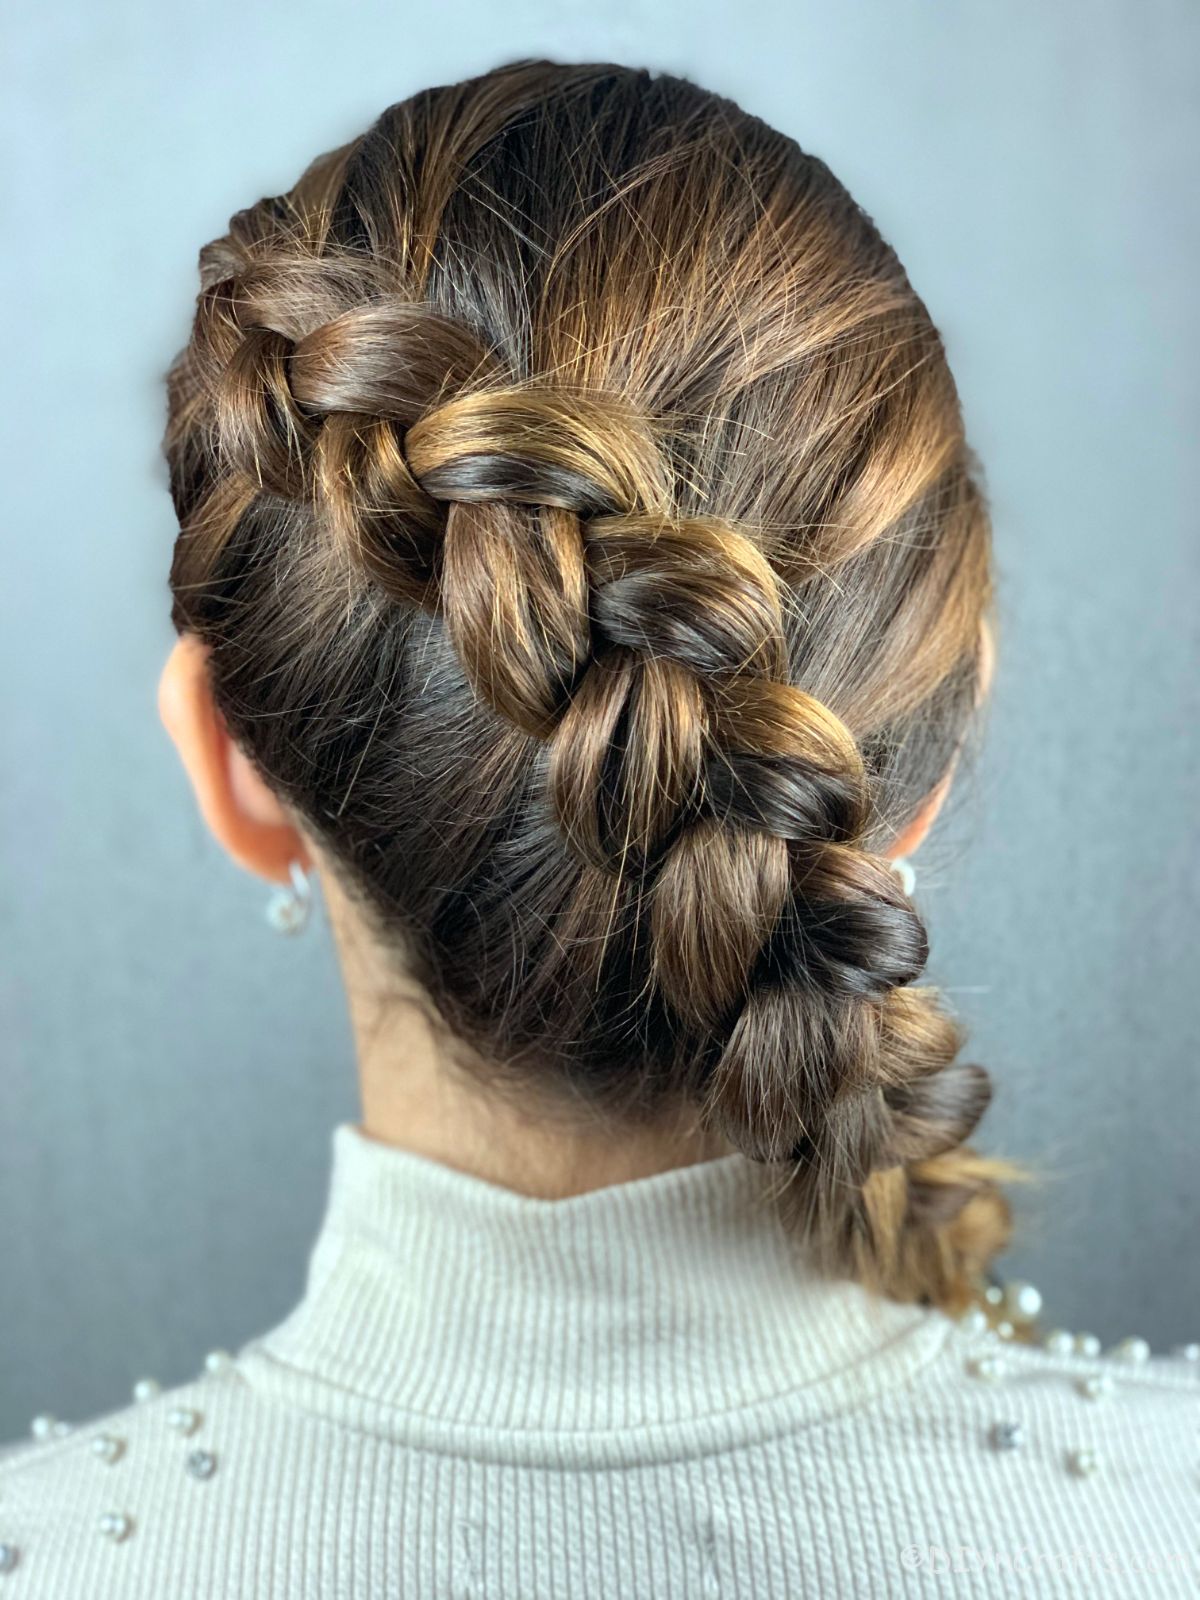
Creating the Dutch Braid
The Dutch braid is often called an "inside-out" French braid, and it gives a really cool, raised effect. Instead of crossing strands over, you cross them under, which makes the braid pop out from the head. This technique is another great way to show how to braid hair with a bit of a twist, literally.
It looks a little more intricate than a French braid, but the steps are very similar, just reversed. If you can do a French braid, you can definitely learn a Dutch braid with just a little bit of practice. It provides a very striking look, often used for pigtails or a single, bold braid down the back, you know.
Step-by-Step Dutch Braid
Prepare Your Hair: Just like with the French braid, start with a section of hair at the crown of your head. Make sure it is smooth and ready to be worked with. This initial setup is very important for a clean braid.
Divide and Begin Under: Divide this section into three equal strands. Now, here is the key difference: instead of crossing over, you will cross *under*. Take the right-most strand and cross it *under* the middle strand. The right strand is now in the middle, and the original middle strand is now on the right. Then, take the left-most strand and cross it *under* the new middle strand. The left strand is now in the middle. This under-crossing is what gives it that raised look.
Add Hair from the Sides (Right, Under): Before crossing the right-most strand under the middle again, pick up a small, new section of hair from the right side of your head. Add this new hair to your right-most strand. Then, cross this combined, thicker right strand *under* the middle strand. It's a bit like building layers, really.
Add Hair from the Sides (Left, Under): Similarly, before crossing the left-most strand under the middle, pick up a small, new section of hair from the left side of your head. Combine this new hair with your left-most strand. Then, cross this combined, thicker left strand *under* the middle strand. You are consistently adding hair from the sides, but always going underneath.
Continue Adding and Braiding Under: Keep repeating steps 3 and 4, always adding new hair from the sides to the outer strand before crossing it *under* the middle. Maintain consistent tension and section sizes for a uniform braid. This consistent under-crossing is what makes the braid stand out so much, that is it.
Finish with a Classic Under-Braid: Once all the hair from the sides has been incorporated, continue with a regular three-strand braid, but keep crossing the strands *under* each other down the remaining length of the hair. Secure the end with a hair tie. It's pretty neat, honestly, how it just pops.
Exploring Other Braid Styles
Once you are comfortable with the basic and French/Dutch techniques, you can start to experiment with many other ways how to braid hair. There are so many variations, each offering a unique look. These styles often build upon the core principles you have already learned, just with a slight twist or different way of sectioning, you know.
From intricate patterns to simple, bohemian looks, the world of braids is quite vast. Learning these can add a lot of variety to your hairstyling routine. Here are a couple more popular ones to try, and they are pretty fun, too.
Fishtail Braid
The fishtail braid looks very complex, but it is actually quite simple once you get the hang of it. It uses only two main sections of hair, rather than three, and involves taking small pieces from the outside of each section and crossing them over to the inside of the other section. It creates a very delicate, intricate pattern, almost like a fish skeleton, which is where it gets its name.
This braid is perfect for a relaxed, bohemian vibe, or it can be dressed up for a more formal occasion. It works well on longer hair, and it is a good way to use a different technique for how to braid hair without too much fuss, really.
Waterfall Braid
The waterfall braid is a beautiful, ethereal style where strands of hair appear to cascade down, like a waterfall. It is a variation of the French braid, but instead of incorporating all the hair, you drop one of the strands each time you cross, letting it fall freely. Then, you pick up a new piece to continue the braid. It is a very pretty look for special events or just to add a touch of elegance to your everyday style.
This braid typically goes across the head, rather than down the back, and it looks lovely with loose, flowing hair. It is a little bit more challenging to get the hang of, but the result is truly stunning. It is definitely worth the effort to learn this particular way how to braid hair.
Tips for Different Hair Types
The texture and thickness of your hair can really affect how easy or difficult it is to braid, honestly. What works well for one hair type might not be the best approach for another. Knowing a few tricks for your specific hair can make the process of how to braid hair much smoother and more enjoyable, that is it.
Just like choosing the right fishing line – say, a good 100# braid for strength, or a lighter one for finesse – the right approach for your hair type makes all the difference. Here are some pointers for common hair types, which are pretty helpful.
Fine or Slippery Hair
Texturizing Products: Use a texturizing spray, dry shampoo, or a light mousse before braiding. These products add grip and volume, making the hair less slippery and easier to hold onto. This is practically a must for fine hair, you know.
Damp Hair: Braiding fine hair when it is slightly damp can help it hold the style better. Just make sure it is not soaking wet, as this can cause damage. A little dampness makes it more pliable, you see.
Tighter Braids: Start with a slightly tighter tension to ensure the braid holds. You can always gently loosen it afterward for a softer look, if that is what you prefer.
Small Sections: Take smaller sections of hair when braiding. This allows for more interwoven strands, which helps to secure the braid better and gives it a fuller appearance, too.
Thick or Curly Hair
Detangle Thoroughly: Curly or thick hair can get tangled easily. Make sure to thoroughly detangle your hair before you begin, perhaps with a wide-tooth comb and a leave-in conditioner. This step is very important, actually.
Sectioning Clips: Use clips to section off hair you are not currently braiding. This keeps the hair neat and out of the way, making it easier to manage large amounts of hair. It is a very practical tip.
Moisture: Ensure your hair is well-moisturized to prevent frizz and make it more pliable. A little hair oil or styling cream can work wonders. This helps with smoothness and control, too.
Looser Tension: For very thick or curly hair, you might want to braid with a slightly looser tension to avoid pulling and to give the braid a more relaxed feel. This also helps prevent headaches, which is good.
Consider Braiding Wet: Some curly hair types are easier to braid when wet or very damp, as this helps to stretch the curls and reduce shrinkage. This is a common practice for protective styles, you know.
Keeping Your Braids Looking Great
Once you have mastered how to braid hair, you will want your creations to last and look their best. The longevity of your braid, much like the durability of a good fishing line, depends on a bit of care. While the "braid color doesn’t really matter that much" for visibility to a steelhead, the color of your hair and any added accessories certainly matter for your look. You can use colorful hair ties or ribbons to add a pop of color and personality to your braids, which is pretty fun.
To help your braids stay neat and fresh for longer, try sleeping on a silk or satin pillowcase. This reduces friction and helps prevent frizz and loosening of the braid. You can also loosely tie a silk scarf around your head before bed for added protection. This simple step can really extend the life of your braid, honestly.
If your braid starts to look a little messy or has flyaways, a light mist of hairspray or a tiny bit of styling cream smoothed over the surface can help. For loose strands, a bobby pin can be a quick fix. You want to avoid over-touching your braids, as this can cause them to loosen more quickly. Learn more about general hair care tips to keep your hair healthy, which will also help your braids look their best.
When it is time to take your braids out, be gentle. Start from the bottom and slowly unweave the strands, using your fingers or a wide-tooth comb. Avoid pulling or tugging, as this can cause breakage. A little leave-in conditioner can help with detangling after the braid is removed. You can find more helpful advice on how to care for your hair post-braid on our site. Learn more about hair styling on our site, and link to this page for specific braid care tips.
Frequently Asked Questions About Braiding
People often have a few questions when they are learning how to braid hair, and that is completely normal. Here are some common ones, with some simple answers to help you out, you know.
Q: How do I make my braids look fuller and thicker?
A: After you finish braiding, gently pull apart each loop of the braid with your fingers. This "pancaking" technique loosens the weave and makes the braid appear wider and more voluminous. It is a very simple trick that makes a big difference, honestly.
Q: What is the best way to keep my braids from slipping out?
A: Starting with day-old hair or adding a texturizing product like dry shampoo can give your hair more grip. Also, making sure your sections are even and maintaining consistent tension throughout the braiding process helps a lot. Using good quality hair ties that do not slip is also pretty key.
Q: Can I braid my hair if it is really short?
A: Yes, you can! While longer hair offers more options, you can still do small braids on shorter hair, especially around the face or at the nape of the neck. Micro-braids or accent braids can work well, and sometimes a little gel can help keep shorter pieces in place, that is it.
How To Side French Braid

French braid waves tutorial – Artofit
Step By Step Braided Hairstyles With Pictures
