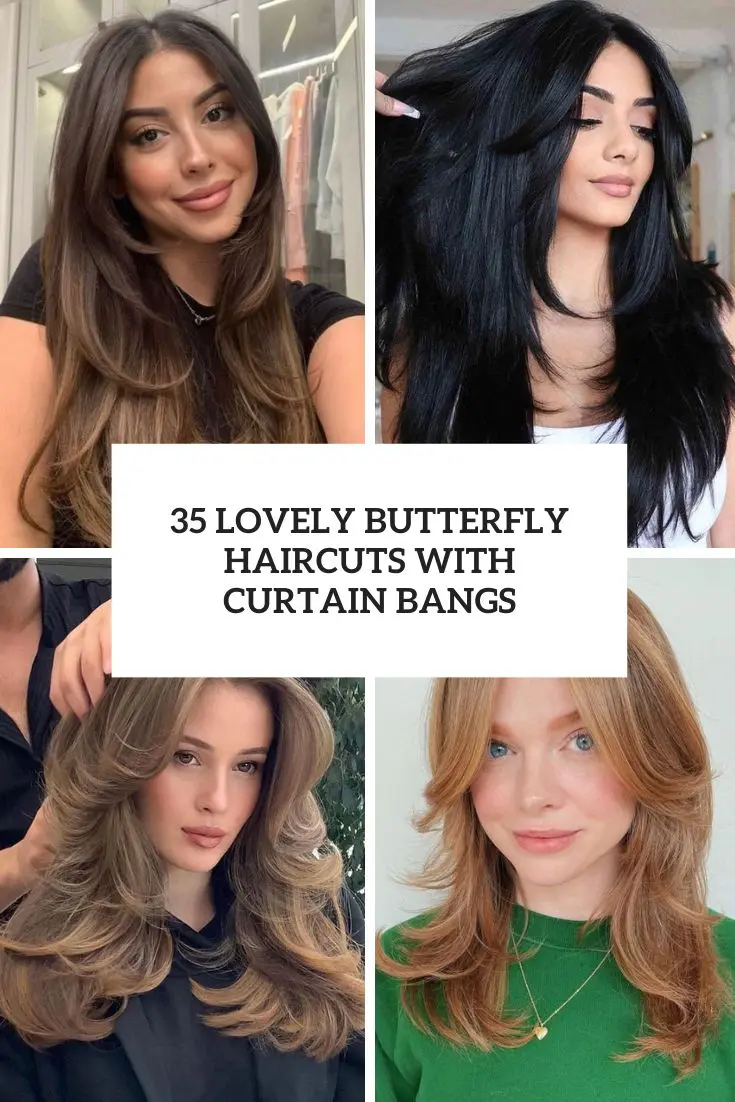
How To Cut Curtain Bangs: Your Guide To A Fresh Look
Thinking about a new hair vibe? Perhaps you've seen those soft, face-framing pieces that just seem to float around everyone's face, making them look effortlessly chic. That, you know, is the magic of curtain bangs. They are a style that truly works for so many people, adding a touch of softness and a bit of a retro feel without a huge commitment. So, if you're wondering how to get this popular look, you've come to the right spot.
Lots of people are looking for ways to update their hair without a full chop, and curtain bangs really fit that bill. They are, in a way, a perfect way to try out bangs without going too short or too bold. This style just kind of melts into your hair, offering a gentle frame for your face. It's pretty versatile, too, which is why it stays so popular.
This guide will walk you through the steps for creating this lovely look at home. We will cover what you need, how to make the cuts, and even some styling tips. It's really about giving you the confidence to try something new with your hair, perhaps. You might be surprised at how simple it can be to get that fresh, stylish feel.
Table of Contents
- Why Curtain Bangs Are a Great Idea
- Getting Ready: What You'll Need
- The Step-by-Step Guide to Cutting Your Own Curtain Bangs
- Tips for a Smooth Cut
- Styling Your New Curtain Bangs
- Common Questions About Curtain Bangs
- Final Thoughts
Why Curtain Bangs Are a Great Idea
Curtain bangs have been a big deal for quite some time, and it's easy to see why. They offer a pretty soft look that just frames your face in a lovely way. It's almost like a gentle curtain opening up to show your features. This style, you know, is not too heavy, which is a big plus for many people.
They also grow out very gracefully, which means less fuss over time. Unlike blunt bangs that can feel like a commitment, curtain bangs tend to blend in as they get longer. This makes them a really forgiving choice for anyone thinking about a change, you know, without too much worry.
What Makes Them Popular
A big part of their popularity comes from their ability to flatter many different face shapes. They sort of create an illusion of softness around the face, making cheekbones pop and eyes stand out. People really like how they can change a look without a drastic cut, in a way.
Plus, they have a cool, effortless vibe that feels very current. They bring a bit of a retro feel, like from the 70s, but also look completely fresh today. It's a style that just works with a lot of different hair lengths and textures, too, which is pretty great.
Who Looks Good in Them
Curtain bangs are quite versatile, meaning they suit a wide range of people. If you have a round face, they can help create a more elongated look. For those with a heart-shaped face, they can soften the forehead area. They are really adaptable, you know.
They also work well with different hair types, from straight to wavy, and even curly hair can rock this style. The key is how they are cut to frame the face. So, it's pretty much a style that many can enjoy, regardless of their hair's natural texture.
Getting Ready: What You'll Need
Before you even pick up the scissors, it's important to get everything ready. Having the right tools makes a huge difference in how your curtain bangs turn out. It's like preparing for any project, you know; good tools make the job easier and the results better.
Taking a moment to gather your supplies means you won't have to stop halfway through. This helps you stay focused and ensures a smoother cutting process. It's a bit like setting the stage for a successful hair transformation, really.
Tools
You will need a few key items for this project. First, get a pair of sharp hair-cutting shears. Kitchen scissors or craft scissors just won't do the job well, they can actually damage your hair. So, a proper pair of hair shears is very important, you know.
Next, grab a fine-tooth comb for precise sectioning. You'll also want a couple of hair clips to keep the rest of your hair out of the way. A mirror, preferably a large one, is also essential. Some people like to use a handheld mirror too, for different angles.
A spray bottle with water can be helpful, especially if your hair dries quickly. You might also want a blow dryer and a round brush for styling later. Having all these items ready before you start will make the whole process much smoother, you know, and less stressful.
Hair Prep
Start with clean, dry hair. This is pretty important because wet hair stretches, and if you cut it wet, it will look much shorter once it dries. So, dry hair gives you a more accurate idea of the length, you know, and how it will fall.
Make sure your hair is brushed out and free of any tangles. This helps you get clean sections and a more even cut. You want your hair to be in its natural state, without any styling products, so you can see its true texture and how it lays. It's just a better way to start, really.
The Step-by-Step Guide to Cutting Your Own Curtain Bangs
Now for the main event: actually cutting your bangs. Take your time with each step. Remember, you can always cut more hair off, but you can't put it back on. So, a slow and steady approach is really the best way to go about this, you know, to get the look you want.
This process is about creating a soft, feathered look, not a blunt line. It's more about shaping than just cutting straight across. So, keep that in mind as you work through the steps. You're aiming for a gentle, face-framing effect, you know, that just flows.
Sectioning Your Hair
This is a very important first step. Use your comb to create a triangular section of hair at the top of your head. The point of the triangle should be at the crown, and the two bottom corners should extend down to just above your temples. This section, you know, will become your bangs.
The wider the base of your triangle, the thicker your bangs will be. If you want thinner bangs, make the triangle narrower. Use your hair clips to secure the rest of your hair out of the way. This helps prevent accidentally cutting hair that isn't part of your bangs, which is pretty vital.
Make sure the part for your triangle is very clean and straight. This clean sectioning helps ensure that your bangs will be even. It's like building a good foundation, you know, for the rest of your cut. Take your time here to get it just right.
Finding Your Starting Point
Take the section of hair you just isolated and bring it forward, right in front of your face. Imagine where you want the shortest part of your bangs to fall. This is typically around your cheekbones or jawline. It's a bit of a personal choice, you know, where you want them to hit.
Some people like their curtain bangs to be quite short, hitting right at the cheekbones. Others prefer them a little longer, maybe closer to the jaw. Hold the hair between your index and middle fingers, keeping it straight down. This is your guide for the initial cut, really.
Make sure you are holding the hair with light tension, not pulling it too tight. If you pull too hard, the hair will spring up shorter once you release it. So, a gentle hold is what you're aiming for here, you know, to get an accurate length.
The First Cut: Longer is Better
Now, with your hair held straight down, make a small, diagonal cut. You'll want to cut from the center of your face outwards, aiming for the desired shortest point. Remember to start longer than you think you want them. You can always trim more, but you can't add hair back, you know.
Instead of cutting straight across, angle your scissors slightly upwards as you cut. This helps create that soft, feathered edge that curtain bangs are known for. It's a bit like sketching a gentle curve, rather than drawing a sharp line. This initial cut is pretty important.
Cut just a tiny bit at a time. Seriously, a little snip goes a long way. You can always go back and make them shorter if you want. This cautious approach is really key to avoiding any big mistakes. It's better to be safe than sorry, you know, with your hair.
Shaping the Sides
Once you have that initial diagonal cut, you'll start to shape the sides. This is where the "curtain" effect really comes in. You want the hair to gradually get longer as it moves away from your face, blending into the rest of your hair. This is pretty much the defining feature of the style.
Take one side of your bangs and comb it down. Using your fingers as a guide, continue the diagonal line you started, making the hair longer as it goes towards your ear. You're creating a soft, sweeping shape. It's a gentle slope, you know, that frames your face.
Repeat this same process on the other side. Try to make both sides as symmetrical as possible. You can use the first side as a reference point. It might take a few small snips to get the shape just right on both sides. So, take your time, you know, and be patient.
Checking Your Work
After you've made your initial cuts, comb your bangs down and let them fall naturally. See how they frame your face. Do they feel too short? Too long? Are the sides blending well? This is your chance to assess and make small adjustments. It's a pretty important step, you know.
You can also try parting your hair in the middle and letting the bangs fall to either side. This will give you a good idea of how they look when styled. Walk around a bit, shake your head, and see how they move. This helps you understand their natural flow, really.
If you find one side is longer than the other, make very small trims to even them out. Remember to always cut from the center outwards, maintaining that diagonal angle. It's about tiny corrections, not big chops, you know, at this stage.
Refining the Edges
To get that soft, wispy look, you can use a technique called "point cutting." Instead of cutting straight across, hold your scissors vertically and snip into the ends of the hair. This removes bulk and creates a softer, more blended edge. It's a bit like feathering the ends, really.
Do this sparingly, just on the very ends of your bangs. This helps them lay better and look less blunt. It also helps them blend more seamlessly into the rest of your hair. It's a pretty good way to get that professional finish, you know, without being a pro.
Stand back and check your work again after refining. Sometimes, a fresh perspective helps you see areas that need a little more attention. You want them to feel light and airy, not heavy. So, keep that in mind as you make these final touches.
Tips for a Smooth Cut
Cutting your own hair can feel a bit scary, but with some good tips, you can do it well. These suggestions are here to help you avoid common mistakes and get a result you'll be happy with. It's really about making the process as easy as possible for you, you know.
Remember that practice makes perfect, but for hair, it's better to be cautious the first time. You can always refine things later. So, take these tips to heart, and you'll be on your way to great curtain bangs, you know, pretty quickly.
Don't Cut Wet Hair
This is a very important rule. Hair stretches when it's wet, so if you cut it to your desired length while it's damp, it will spring up and be much shorter once it dries. Always cut your curtain bangs on dry hair. This helps you see the true length and how they will fall naturally, you know.
Cutting dry hair gives you a more accurate picture of the final look. It prevents those "oops, it's too short!" moments. So, make sure your hair is completely dry before you start snipping. It's a pretty simple rule, but it makes a big difference.
Small Snips Are Key
Never try to cut a lot of hair at once. Take very small snips, just a tiny bit at a time. This allows you to control the length and shape much better. It's like building something piece by piece, you know, rather than trying to do it all at once.
Think of it as sculpting rather than chopping. You're gradually taking away hair until you reach the desired look. This cautious approach minimizes the chance of making a mistake that's hard to fix. So, tiny cuts are really your best friend here.
Mirror, Mirror
Use a good mirror, and make sure you have plenty of light. Sometimes, having a second mirror, like a handheld one, can help you see different angles. This is pretty important for checking symmetry. You want to see both sides clearly, you know, as you work.
Don't just look straight on. Turn your head, check from the side, and even step back to get a full view. This helps you see how the bangs are framing your entire face, not just the front. It's a good way to catch any unevenness, really.
Patience Pays Off
Don't rush the process. If you feel frustrated or unsure, take a break. Come back to it later with fresh eyes. Rushing often leads to mistakes that are harder to correct. So, a calm and patient approach is very helpful, you know, when cutting your hair.
This is your hair, and you want it to look good. Giving yourself enough time to do it right will lead to a much better outcome. It's not a race, it's a transformation. So, just breathe and take your time, you know, every step of the way.
When to Call a Pro
If you're feeling really unsure, or if you've tried and it's not quite right, it's totally okay to see a professional stylist. They can fix any unevenness or give you the perfect curtain bangs if you prefer. There's no shame in seeking expert help, you know.
Sometimes, a professional eye and hand can achieve a level of precision that's hard to get at home. They can also give you advice on styling and maintenance. So, if in doubt, a trip to the salon is always a good option, really, to get that perfect finish.
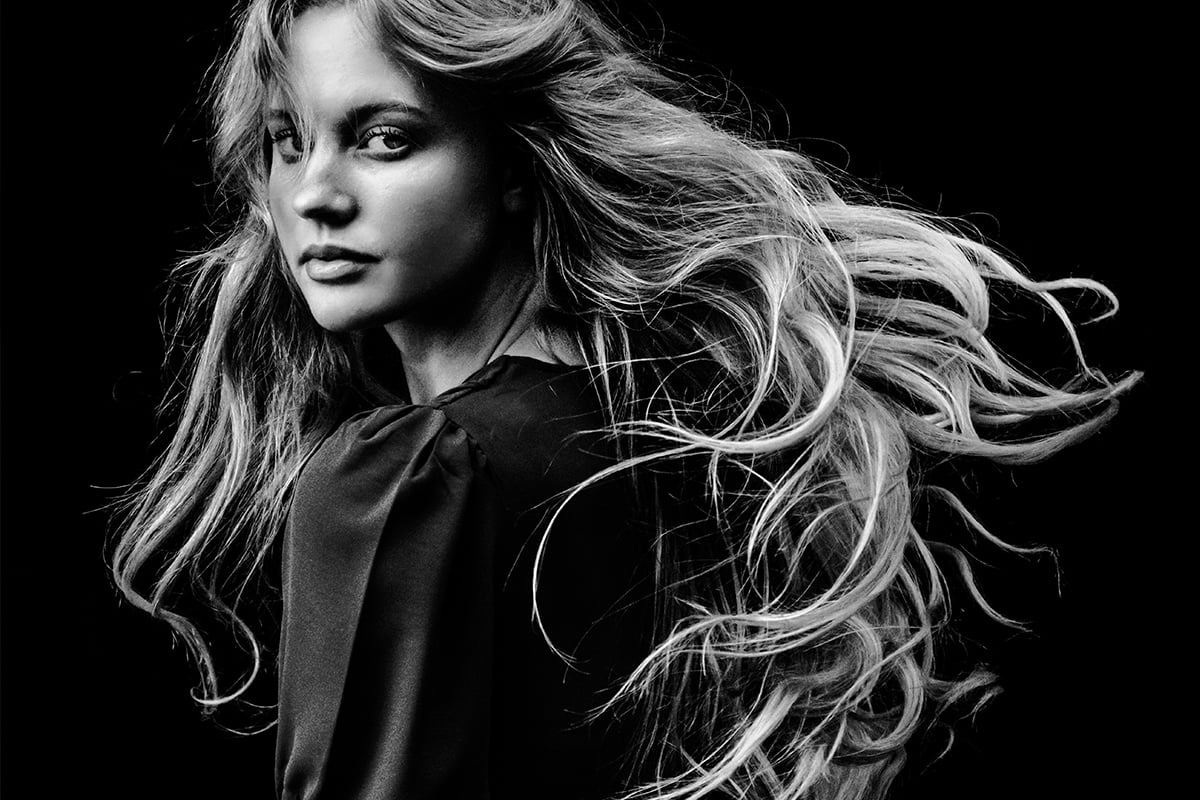
Styling Your New Curtain Bangs
Cutting your curtain bangs is just the first part; styling them is where they truly come alive. How you dry and shape them makes a big difference in their overall look. It's pretty much what gives them that signature soft, swept-back appeal, you know.
With a few simple techniques and the right products, you can make your new bangs look amazing every day. It's about enhancing their natural flow and creating that effortless vibe. So, let's look at how to get them just right, really.
Drying Techniques
The best way to style curtain bangs is often with a blow dryer and a round brush. After washing your hair, rough dry your bangs until they are about 80% dry. Then, use a small to medium round brush to blow them away from your face, one side at a time. This helps create that outward curve, you know.
Alternatively, you can use a flat iron or a curling iron to create the same outward flick. Just make sure to use a heat protectant first. The goal is to give them a gentle bend that frames your face, not a tight curl. It's a bit about guiding the hair into place, really.
Product Picks
A lightweight texturizing spray can give your curtain bangs some hold and definition without making them stiff. A dry shampoo can also be a good friend, especially on second-day hair, to absorb oil and add volume. These products help maintain that airy, effortless look, you know.
Avoid heavy gels or mousses that can weigh your bangs down. You want them to feel light and bouncy. A little bit of product goes a long way. So, choose wisely to keep them looking fresh and natural, really.
Everyday Looks
Curtain bangs are great because they are so versatile. You can wear them parted down the middle, swept to one side, or even pinned back for a different look. They blend beautifully with ponytails, buns, or just worn down. It's pretty much a style that works with everything, you know.
For a quick refresh, a little dry shampoo at the roots and a quick blow-dry with a round brush can bring them back to life. They are meant to be a bit undone, so don't worry too much about perfection. That's part of their charm, really.
Common Questions About Curtain Bangs
What tools do I need to cut curtain bangs?
You will need a few specific tools for this. A very sharp pair of hair-cutting shears is a must. Regular scissors, you know, just won't cut it without damaging your hair. You also need a fine-tooth comb for clean sections, and a couple of hair clips to keep other hair out of the way. A good mirror is pretty important, too.
Can I cut curtain bangs myself if I'm not a pro?
Yes, many people successfully cut their own curtain bangs at home. The key is to take your time and make very small cuts. It's better to cut less than you think you need, as you can always trim more. If you follow the steps carefully and use the right tools, it's pretty doable, you know.
How do I style curtain bangs after cutting them?
The best way to style them is usually with a blow dryer and a round brush. Blow them away from your face, one side at a time, to create that outward curve. A little texturizing spray or dry shampoo can help with hold and volume. You want them to look soft and airy, you know, not stiff.
Final Thoughts
Cutting your own curtain bangs
How To Cut Layered Hair With Curtain Bangs - Infoupdate.org

How cut curtain bangs - honcab
How To Cut Curtain Bangs At Home - Yoper
