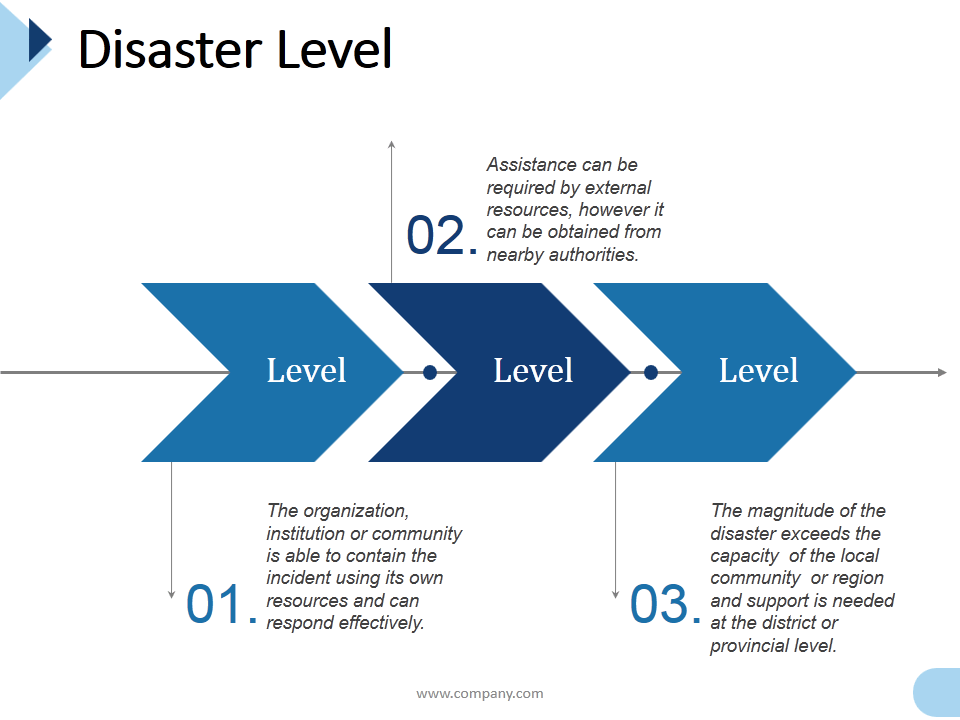
Disaster Management(03) Save Image Image gallery: This One Chart Explains The Entire Justnashy Leak Disaster